Showing posts with label DIY projects. Show all posts

DIY romper/playsuit tutorial

Just wanted to share:

Nylon Mag had a romper tutorial and Behindtheseams was nice enough to share and scan along with instructions on how to make the romper.:) (It took me a minute to figure out the tutorial but I think I get it know. I think you're supposed to use a pair of boyshorts to trace, not bikini briefs. You'll get what I'm babbeling on about after you check it out).


It's probably the easiest tutorial... EVER!
So get thee a nighty slip asap.


Check it out here: http://theseams.blogspot.com/2009/04/quick-update.html


End result:


... and here is ANOTHER one made from 2 t shirts:
http://www.brightestyoungthings.com/style/style-diy-romper/#comment-60166

Make your own colored mascara

Colored mascara trends go in and out of style. One minute their hot and the next their just tacky. Stars like Rihanna and other supermodels are bringing the look back. Covergirl’s New Exact Eyelights Mascara and LashBlast Luxe feature bit of color tint and shimmer.

So why not make your own at home for a fraction of the cost? Here's how you can have several mascara colors for the price of one:

1. Apply your (black/brown) mascara as you normally would.
2. Before it dries, dip a flat eyeshadow brush into a colored eyeshadow and pat on top of your lashes while looking down.

Pictured: Bourjois $7.50 available in 5 shades.


How to make a (retro) romper/playsuit

I've been scouring the net for months trying to find a sewing pattern or tutorial, but till today had no luck. Thanks to Wingmonkey on Youtube my romper obsession can be satisfied. She makes the hottest retro romper I've ever seen! And most importantly she made it out old clothing she had lying around (=my favorite way to DIY since it works out to be free!)


Style: How To Budget And Save Money

So called recession-istas everywhere are doing their best to make their dollars go further. That doesn't mean you need to give up on fashion and buying stuff you really want.
Here are some ways to make your budget go a long way, without having to give up a roof over your head.

1. Wait for items to go on sale.
Sites like Asos and Victoria's Secret have annual sales with ginormous mark downs. Well worth holding out for. I remember seeing a pair of zipper boots marked down from $70 to $17! Plus the Colin Stuart Studded Booties every single blogger was seen wearing, are being sold half price too (Used to be $98, not available anymore).
As for underwear: I usually buy from VS when they have sales going on. You get quality for such a low price. 2. Shop at thrift stores.


3. Create new outfit combinations with clothes you already have in your wardrobe.
Sites like polyvore.com are great for getting more ideas on how to piece together new combinations you may have never thought of. Changing small details like your accesories/shoes can change the look of the outfit too (think heels vs. flat and sandals and what you can pair tops with).

4. Borrow and lend things from friends (and vice versa.)
Just make sure you're all ok with the arrangement first!

5. Search for discount codes and printable store discount coupons always available online.

6. Shop at off-price sites:
bluefly and eBay are great sites for bargains on those high quality designer pieces you really want.

7. Have a clothes swap with friends.

8. Buy one statement piece and wear it all season.
This is one of my favourite way to save money, since it allows me to get that one piece of clothing or shoes I want really badly. There’s nothing like a dramatic new jacket, coat, skirt, scarf, pair of boots, shoes, earrings, brooch or necklace to make you feel - and look - your best.

9. Another golden rule of mine I try and share with others is: know where to skimp on costs and where to splurge. I'll usually buy trendy items from places like Forever 21 and Wetseal. If I'm not sure leather leggings will be in fashion for years to come or how often I'll even wear them, I'd rather not spend as much on them.

And other times (like work-wear) it's best to spend the money and get proper fitting, durable items.
Same goes for heels and other footwear: if it's a trendy pair of shoes you'll only wear ocassionally when you go out, you're better off checking out sites like gojane.com and bakers.com.
A comfy pair of flats I'll need to wear to work everyday I'll glady spend on. No amount of money saving is worth the pain and possible foot issues you get from a poorly made pair.

10. Sell unused clothes on ebay and buy new clothes with the earnings.

11. Learn how to sew.
You can easily alter and re-design otherwise unusable clothes with really basic sewing skills. Alter a bootcut pair of jeans and made them skinny ones (I did the same some weeks back and the results where perfect!).

12. Don't forget your hair and make up which also make a simple outfit look fabulous on it's own.

13. Head to the outlet malls.

14. Budget and spend sensibly
Set aside a certain amount (let's say $100) you'd be willing to spend on fashion every month (or every few months) and stick to it. It really depends on how often you have the urge to splurge.
It will help keep shopping at bay and you won't end up impulse shopping only to later realise how many black shoes you just bought. Sometimes I'll even make a list of things I want to gradually add to my wardrobe or "badly needing- list".

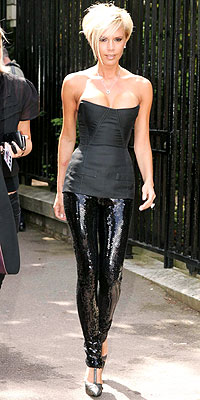
Another super important thing to do is rationalize with yourself. Sure those sequined leggings are hot on Victoria Beckham, but will you have somewhere to wear them to before they go out of fashion?


15. Stock up on accesories.
If you happen to come across a store which sells cheap yet elegant accesories (for me it was Primark in London where I got tons of  bangles and bracelets for $1/$2 each) it's a good idea to buy, buy buy! As I mentioned before, accesories can change up an outfit, but also add some flare. So it's always good to have extra lying around.


Distressed denim -runway inspired

So, lately I have been browsing Chictopia alot..

Tons of people on there with pieces I'd never dream of putting together or even wearing. And this is exactly what I love about it: I seem to get all kinds of inspiration.


Check this DIY look out done by Anita:

(Images property of their rightfull owner)

I really want to try this project out... Actually, if I had a pair of jeans I wasn't using right now I'd be shredding right now.
Your thoughts?

Bold Jewelry: More Is Better


I love how much emphasis is being put into accessorizing lately, to pull outfits together and add that extra edgy-ness. I'm talking about accessorizing your fingers. It seems bigger has become better, and less ISN'T more...


Laurens Conrad from (need I even say) "Gossip girls" and her name ring. I saw this baby on Chic Intuition a few days back and haven't been able to stop thinking about it. It's a fresh take on the pendant name plate Carrie wears on Sex and the City, no? And I really want this ring now.


(Image courtesy of Chic Intuition)


Check these out:
"Stacked rings"


p.s. Speaking of "stacked accesorizing" check out this tutorial from Clutch 22 on how to make DIY connected necklaces. So easy to do.

She even was so helpfull as to include this video for recreating runway looks inspired by Dries Van Noten. I'm digging idea about transforming the bangle into a huge pendant...
Seriously! Watch it... Bobby is a GENIUS.


Getting Started With Nail Art

Via Nail Crack
I did a nail art post some weeks back and decided to do another one. Decorating your fingernails is a quick way to spice up your wardrobe and your mood.
Step 1:
What you will need:
  • Colored nail polish.
  • Clear topcoat and basecoat.
  • Nail art glitter pen.
  • Nail glue.
  • Decals, stickers, confetti – whatever decorative pieces you want to use
  • Manicure sticks

Step 2:
Plan your design. I've made this mistake more times then I'd like to admit: you don't want to get stuck with glue on your nails before you realize that you hate your design or it doesn't fit. Assemble the decorative pieces you want on a flat surface, then lay them out for the look you want. Also, decide if you're going to decorate one nail to make a statement or if you want your entire set of nails to match.


Step 3:
Test design for fit. Fingernails vary in size (by individual and by finger): your pinky nail is smaller than your thumb nail. If you're doing a full set with the same design, test the design by holding it against your smallest and largest nails to determine if you like the look on each.

Step 4:
Prepare the surface. You can apply nail art to a nail already painted the color of your choice or a clear coat. Make sure that your nails are clean and dry before applying decorative items.

Step 5:
Adhere decals, stickers and/or confetti. Stickers, decals and confetti are available with or without sticky backing. The stickers are the easiest to use because they will stick directly to the nail without glue. If you need to use glue, use as little as possible. Put the decal onto the end of a manicure stick; apply a tiny dab of glue to the back, and then position the decal onto your nail. Press lightly with the stick and hold for a few seconds to set the glue.

Step 6:
Draw lines, outlines or shapes. Using a glitter pen or fine line polish, draw any additional design elements you want to add. Remember that your nail is a small canvas and you want to avoid cluttering the design with too much extra embellishment. I even like to plan this design ahead.

Step 7:
Apply top coat. Top coat should be applied once the decorative elements, glitter pen or glue have dried so they don't smudge and make all your hard work go to heck. Apply a layer of topcoat to seal in the design and create level surface. If you used rhinestones or thick decals you may need a second layer of topcoat to make sure it's properly sealed.

Step 8:
Sit back and let your nails to dry. Allowing nails to dry properly when you're done is important, but so is letting the polish dry between coats. If one coat isn't dry, the whole look will be ruined and won't dry at all.  


DIY: Make Your Own Bandage Dress

Own a sewing machine? If not.. know how to stitch?


Well, Chictopia (and their guest blogger rat_pack ) are there to teach you how to make a bandage dress. You know the ones sported by Rumi, Karla, and other famous people in the blogosphere? (Not to mention, I just did a post about the "body con" look.)

Well go click here and here to be taken directly to Chictopia's site for the DIY bandage dress.


Images all courtesy of: Chictopia

My tip: for a bandage skirt try using a tube top !

Nail Art

Ever since I managed to quit nail biting, I've gotten into nail art. It's opened a whole new world of bright bold colors for me and my nailsI decided to invest in these cute nail gems which only cost me about $8 for 144 stones- from Broadway Nails. You get an assortment of shapes like heart, round, petal and flowers shaped stones as well as glue and a topcoat. I'm quite pleased with the results though I do need to get more creative with the patterns. The good thing is I may even be able to re use them if I take really good care of them.


Here's my how-to guide:
1. Apply a basecoat. I never knew how important this was til recently. It smooths ridges and makes nail polish go on smoother and stay on. If you missed it, here is my recommendation for a budget friendly basecoat.)

2. Apply 1-2 coats of your favorite polish. For more a more detailed explanation on applying nail polish perfectly go here. Make sure you let dry properly between coats. I usually just watch tv or go on the elliptical at home in between coats.

3. Apply the nail glue and (with tweezers apply) nail stones to your nails.

4. Sometimes I use gel pens. Metallic colored pens or even pastel to paint on patterns on nails. I find it easiest to work with patterns which include dots, not lines. Why? It's way too hard painting on lines with my left hand. I invested in a set of metallic gel pens with the colors silver, gold, blue, red, green, and purple.

5. Dab the topcoat- DON'T stroke the brush- onto the painted pattern. Stroking it over the pattern like you would with nail polish will smudge all your hard work. I recommend "Sally Hansen Hard As Nails" (about $2-3 and adds high shine).

6. Allow the dabbed on topcoat to dry then brush over all your nails with proper coating.


Here you can see I stuck a red heart-stone in the top corner and painted on 3 silver dots. Still working on getting more creative.


Here are some patterns you can recreate:


You can try these looks by buying nail stickers, glueing them on with adhesive then applying a top coat. Add stones to jazz up the nail stickers:


One more TIP: I recommend using more of the PASTEL pens, instead of metallic gel ones. For some reason, the metallic ones don't dry much, the pastel ones do! So every time I try doing my nails entirely with metallic red, blue, green, etc it smudges! Try doing a white flower and only a silver center for instance. Or add a stone in the middle instead.
Also, if you can it's always much easier to have a friend paint your left hand for you. That's why I stick with dot patterns: much easier to do with my left hand.


DIY: Studded Designer Belt

One of my fave bloggers made a belt much like the Sonya Rikel studded wrap belt she saw on SATC. Definitely worth taking a look at and giving a try when you have the time.


It's posted on threadbanger.com.